Beeswax Processing - Melting, Filtering & Reuse


Beeswax is one of the most overlooked resources in beekeeping. Many keepers scrape it off during inspections and toss it, compost it, or leave it out for bees to recycle — not because it’s worthless, but because they’re unsure what to do with it.
Here’s the truth: beeswax is a valuable byproduct, but only if you handle it with intention. The quality of wax depends entirely on where it comes from and how you process it. Done well, it becomes a flexible material you can reuse in your apiary, trade for foundation, or turn into long-lasting value-added products.
This guide walks you through how to collect, melt, filter, store, and reuse beeswax from your Primal Bee hives — without overcomplicating the process or compromising quality.
Before You Start
Not all beeswax should be used for the same purposes.
Wax that comes from old brood comb, hive tools, or damaged equipment can contain:
- Propolis residues
- Environmental contaminants
- Pathogens from repeated brood cycles
- Residues from treatments or old foundation
That wax still has value — just not for products that touch skin or food. The single most important habit in wax processing is this: Sort wax by source. Label it. Don’t mix it “just to get it done.” That one decision preserves options later.
Sources of Beeswax (From Cleanest to Most Variable)
|
Wax Source |
Typical Cleanliness |
Best Uses |
Avoid Using For |
Notes |
|
Cappings wax |
Very high |
Candles, lip balm, skin products, cosmetics, food-adjacent uses |
— |
Cleanest wax you’ll get. Handle gently, keep separate, and filter carefully. |
|
Burr comb / bridge comb |
High |
Candles, personal care products, wood finishes, crafts |
Food contact unless well filtered |
Often tossed, but very useful. Usually light and clean once filtered. |
|
Light comb from inspections |
Medium |
Candles, wood finishes, leather conditioning, encaustic painting |
Cosmetics, food contact |
Quality depends on age and exposure. Label by source. |
|
Old brood comb |
Low |
Wood finishes, hive equipment preservation, industrial or craft uses |
Candles, skin products, food contact |
Absorbs contaminants over time. Still useful — just not everywhere. |
|
Hive tool scrapings & equipment wax |
Variable / low |
Lubrication, wood treatment, non-contact uses |
Skin or food products |
Contains propolis, debris, and unknown residues. Keep clearly labeled. |
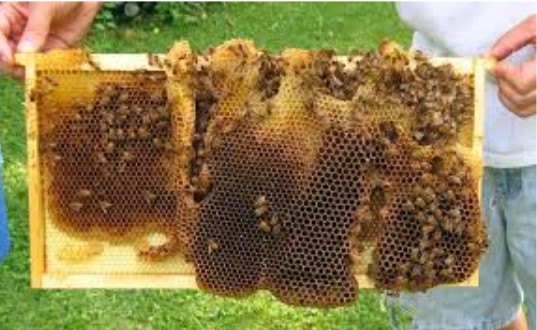
Cappings Wax (Highest Quality)
This is the cleanest wax your hive produces.

- Thin wax caps removed during honey extraction
- Light colored, clean, and relatively pure
- Minimal contact with brood or treatments
- Best suited for candles, cosmetics, and food-adjacent uses
This is usually your largest and cleanest wax source, and the one worth handling most carefully.
Expect some residual honey. That’s normal. Let cappings drain thoroughly, and if needed, give them a brief rinse with warm water. Just make sure the wax dries completely before melting — moisture is what causes spattering and mold later.
Burr Comb & Bridge Comb (Often Discarded, Very Useful)
This is the wax most people throw away — and they don’t need to.
- Excess comb built between frames or hive bodies
- A natural result of bees filling gaps
- Usually light colored and relatively clean
- Collected during routine inspections
Because this comb is often freshly built and lightly used, it can be nearly as versatile as cappings wax once filtered. Even if you don’t plan to process it immediately, it’s worth saving.
Comb Wax from Frames (Variable Quality)
This wax requires more judgment.
- Old frames being replaced
- Damaged comb removed during inspections
- Natural comb built in unwanted areas
- Quality depends heavily on age and use
Comb that has gone through multiple brood cycles absorbs more debris and environmental material over time. This wax still has value, but it’s better reserved for wood finishes, equipment preservation, encaustic painting, or industrial uses, rather than cosmetics or food contact.
Collecting Wax Throughout the Year
Wax collection isn’t a single event. It happens in small moments, spread across the season.
During Honey Extraction
This is your cleanest opportunity.
- Save all cappings from the uncapping process
- Allow honey to drain fully before storage
- Store in airtight containers if not processing immediately
Don’t worry about getting wax “perfectly clean” at this stage. Filtering happens later.
During Routine Inspections
These scraps add up.
- Scrape excess wax from frames and hive bodies
- Collect burr comb and bridge comb
- Remove old, dark comb periodically as part of good hive management
Many keepers discard this material out of habit. Saving it instead creates a steady secondary wax supply with almost no extra effort.
Equipment Maintenance & Seasonal Cleanups
Wax shows up in unexpected places.
- Scrape wax buildup from hive tools
- Collect wax from frame cleaning
- Save wax from damaged or retired equipment
Annual deep cleanings often yield more wax than people expect. Just label it clearly — this wax is usually best reserved for non-skin-contact uses.
Wax Processing Equipment (What You Need — and What You Don’t)
Melting Options
- Double boiler: Safest and best for beginners
Dedicated slow cooker: Works well for small batches (wax only — never food again) - Solar wax melter: Efficient for larger volumes
- Electric wax melter: Useful if you process frequently
You don’t need specialized equipment to start. Controlled heat matters more than gear.
Filtering Supplies
- Cheesecloth or muslin for initial filtering
- Fine mesh strainers for intermediate passes
- Coffee filters for final, high-clarity wax (after using a primary filtering process first, like a cheesecloth)
- Paint strainers as an inexpensive first pass
Filtering works best in stages. Trying to do it all at once just clogs filters.
Containers & Storage
- Heat-resistant containers (Pyrex or metal)
- Silicone molds or baking blocks
- Airtight storage containers for finished wax
- Dedicated equipment — don’t reuse food containers
Safety & Temperature Control (This Matters)
Wax is flammable. Most quality issues come from overheating.
- Use heat-resistant gloves and old clothing
- Work in a well-ventilated space
- Keep a fire extinguisher nearby
- Never exceed 185°F (85°C)
Lower temperatures preserve color, aroma, and flexibility. A thermometer is simple insurance.
Basic Wax Processing Steps
Step 1: Pre-Cleaning
Before melting:
- Remove dead bees, wood chips, and propolis chunks
- Break wax into smaller pieces for even melting
- Sort by source and color
- Rinse sticky cappings if needed
- Air dry completely
Clean input = cleaner output.
Step 2: Gentle Melting
Double boiler method (recommended):
- Water in the lower pot
- Wax container above the water
- Water barely simmering
- Stir occasionally
Never melt wax directly over a burner.
Step 3: Filtering (Do This in Passes)
- First pass: coarse cloth or paint strainer
- Second pass: fine mesh
- Final pass: coffee filter or fine cloth
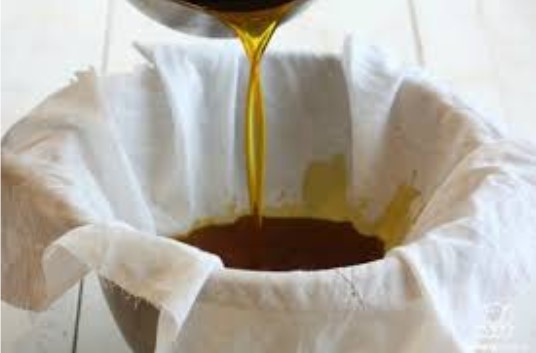
Pour slowly and let gravity do the work. Rushing creates cloudy wax.
Step 4: Settling & Finishing
- Let wax cool slowly
- Impurities settle at the bottom
- Once solid, scrape off the dirty base
- Trim edges where debris collects
Re-melt and repeat if higher purity is needed.
Advanced Processing Techniques
Solar Wax Melting
Solar melters are excellent for large quantities, especially in warm climates.
Basic setup:
- Insulated box or cooler
- Glass or plexiglass lid
- Black metal pan
- Drainage channel to separate wax from debris
▶️My simple Solar Wax Melter for Beeswax
Steam Processing
Steam extraction melts wax without direct heat.
- Steam melts wax
- Debris stays behind
- Clean wax drains away
This method is especially useful for older or dirtier comb, but unnecessary for clean cappings.
▶️Refining Beeswax With A Steam Wax Melter
Wax Uses & Applications
Traditional Beekeeping Uses
- Rolling or exchanging wax for foundation
- Sealing hive joints
- Waterproofing wood surfaces
- Lubricating moving parts
- Preserving wooden equipment
Value-Added Products
High-grade wax (cappings, clean burr comb):
- Candles
- Lip balms and skin products
- Cosmetics
- Food-adjacent uses
Lower-grade wax:
- Furniture polish
- Wood finishes
- Leather conditioning
- Encaustic painting
- Tool lubrication
- Crayons and craft uses
Clean, well-filtered wax is also entered into shows and judged on clarity, feel, aroma, and appearance, not just color.
Quality Control: What Good Wax Looks Like
High-quality beeswax should have:
- Light to medium yellow color (depending on source)
- Smooth, even surface
- Clean break when cold
Slight flexibility when warm - Pleasant honey-like aroma
Cloudiness or debris means more filtering is needed — not that the wax is ruined.
Storage & Record Keeping
- Store wax in solid blocks
- Keep airtight, cool, dry, and dark
- Label by source and processing date
- Rotate older wax first
Tracking input vs. output helps you understand what your hive produces and where wax processing makes sense for you.
Troubleshooting Common Issues
Dark wax:
→ Overheating or old source material
Cloudy wax:
→ Incomplete filtering or pouring too fast
Brittle texture:
→ Age or contamination
Mold:
→ Moisture trapped before storage
Nearly all issues trace back to heat, moisture, or rushing.
Bottom Line
You don’t need industrial equipment to process beeswax well. Low heat, patience, and sorting by source matter far more than gear.
Handled thoughtfully, beeswax becomes one of the most versatile and long-lasting outputs of your hive — useful long after the honey is gone.
On this Page
- Before You Start
- Sources of Beeswax (From Cleanest to Most Variable)
- Cappings Wax (Highest Quality)
- Burr Comb & Bridge Comb (Often Discarded, Very Useful)
- Comb Wax from Frames (Variable Quality)
- Collecting Wax Throughout the Year
- During Honey Extraction
- During Routine Inspections
- Equipment Maintenance & Seasonal Cleanups
- Wax Processing Equipment (What You Need — and What You Don’t)
- Melting Options
- Filtering Supplies
- Containers & Storage
- Safety & Temperature Control (This Matters)
- Basic Wax Processing Steps
- Step 1: Pre-Cleaning
- Step 2: Gentle Melting
- Step 3: Filtering (Do This in Passes)
- Step 4: Settling & Finishing
- Advanced Processing Techniques
- Solar Wax Melting
- Steam Processing
- Wax Uses & Applications
- Traditional Beekeeping Uses
- Value-Added Products
- Quality Control: What Good Wax Looks Like
- Storage & Record Keeping
- Troubleshooting Common Issues
- Bottom Line


