Identifying and Supporting Strong vs Weak Colonies


Primal Bee’s insulated design helps colonies maintain a stable internal environment, but colony strength still comes down to the same fundamentals: population size, brood production, stores, and whether the bees have the right amount of space for their current numbers.
Key principle: the most effective intervention is usually space management. When a colony is weak, giving it less space to heat and defend often matters more than any other adjustment. When a colony is strong, staying ahead of space needs reduces congestion and swarm pressure.
Colony Strength Assessment
You do not need a full tear-down inspection to classify a colony as strong or weak. In many cases, you can make a reliable call using a combination of:
- Frame coverage (how many frames are covered with bees)
- Brood pattern quality and consistency
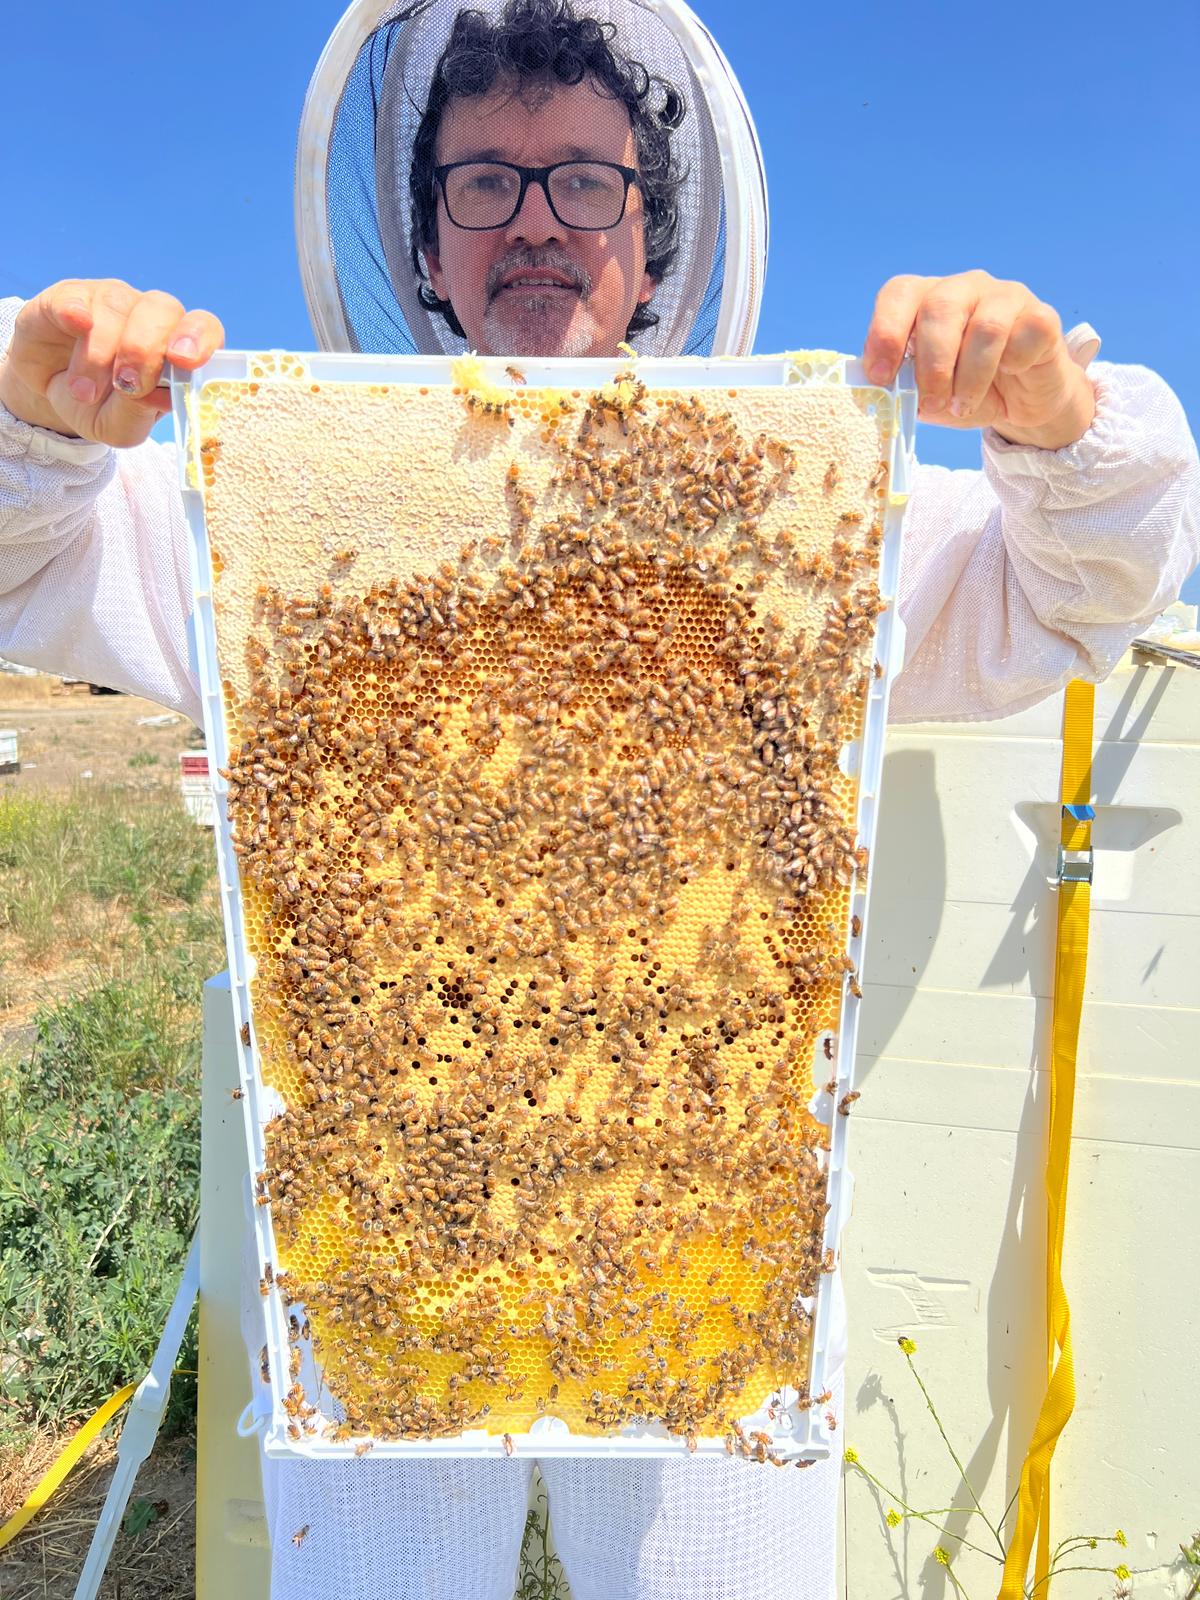
- Stores (honey/nectar and pollen)
- Entrance activity (including pollen coming in)
Strong Colony Indicators
A strong colony typically shows most of the following:
- Dense bee coverage across 6–8 frames in the nest area
- Continuous, elliptical brood patterns spanning multiple frames
- Multiple brood stages present (eggs/larvae/capped brood)
- Steady forager traffic at the entrance
- Bees returning with visible pollen loads (pollen is primarily brood food)
Weak Colony Indicators
A weak colony typically shows several of the following:
- Bees covering 4 or fewer frames in the nest area
- Brood limited to 1–2 frames, or inconsistent patches
- Sparse coverage and slow movement across frames
- Light entrance activity
- Little/no pollen coming in over multiple days during normal foraging weather
Practical Note: “Do I have to find the queen?”
No. Many beekeepers rarely see their queen. A more reliable approach is to look for fresh brood/eggs and overall brood consistency. If you do not see eggs, pollen returning at the entrance is still a strong sign there is brood being fed inside.
Non-Invasive Colony Growth Monitoring
Colony growth can often be assessed without opening the hive. Non-invasive monitoring methods reduce disturbance while providing reliable signals about colony health, brood activity, and expansion readiness.
These tools are optional and should be used to confirm trends, not replace visual and behavioral assessment.
Weight Monitoring
Hive weight trends are one of the most reliable external indicators of colony progress.
- Gradual weight increase indicates nectar intake and storage
- Rapid gains during flow suggest super readiness
- Sudden drops may indicate swarming, robbing, or dearth
- Continuous monitoring scales can transmit data via Bluetooth for trend tracking
Weight changes are most useful when viewed over time, not as single readings.
Temperature and Humidity Monitoring
Internal sensors can help confirm brood presence and cluster behavior.
- Rising internal temperatures often indicate brood expansion
- Stable temperature bands suggest a well-regulated cluster
- Shifts in heat location may indicate brood area movement within the nest
- Excess humidity can signal feeding or ventilation issues
Sensor data should be interpreted alongside brood, pollen intake, and entrance activity, not in isolation.
Configuration Management by Colony Strength
Primal Bee hives allow you to match the hive cavity to the colony using follower boards. Most beekeepers will recognize the term “follower board,” and it is the preferred terminology for guides and kits.
Weak Colony Configuration (Space Reduction)
Goal: consolidate the cavity so a smaller population can heat, defend, and grow efficiently.
Recommended starting configuration:
- Place 3 frames with foundation on the active side, the follower board in the middle, and 4 frames with foundation on the storage side. The kit ships with 1 follower board.
- The bees start on the 3-frame side — this is their active nest area with stores within reach and room to grow.
Why this works:
- Smaller cavities are easier for fewer bees to keep warm
- Concentration reduces energy spent on thermoregulation
- Bees can stabilize the brood nest and expand more predictably
Strong Colony Configuration (Full Access)
Goal: remove unnecessary constraints so the colony can expand naturally.
Recommended configuration:
- Install 8 frames with foundation
- Remove follower boards as the colony demonstrates sustained coverage and brood expansion
- Maintain a continuous brood area to reduce disruption to brood rearing and nurse bee movement
Progressive Colony Management
Colonies shift strength over time. Adjust cavity size gradually instead of jumping between “small” and “full” configurations.
Indicators to Expand Space
Colonies may move through these stages at different speeds depending on forage, weather, and queen quality. Management decisions should follow what the bees are doing, not the calendar.
Consider expanding when you see:
- Bees consistently covering the follower board area
- Brood patterns extending toward frame edges
- Increased entrance activity and consistent pollen intake
- Multiple frames of new comb being drawn
A practical expansion rule:
- Once bees are using 75–100% of accessible frames and brood comb is building, move the follower board one frame at a time.
How to Expand
- Move the follower board one position over to give the bees access to one additional frame.
- Reassess after 1–2 weeks (or sooner during heavy buildup)
Indicators to Reduce Space
Consider reducing space if you see:
- The cluster has pulled back to fewer frames
- Brood area is shrinking
- Entrance traffic drops noticeably
- The colony appears unable to maintain a cohesive brood area
Supporting Weak Colonies
Step 1: Confirm the Basics
Before making changes, verify:
- Food stores are present and accessible (honey/nectar + pollen)
- There is evidence of brood activity (brood/eggs, or pollen coming in)
- No obvious pest or disease indicators
Step 2: Reduce Space First
- Consolidate to a smaller cavity using follower boards
- Remove empty, unused frames from the active cluster area
- Keep stores close to the cluster so bees do not need to cross empty space
Step 3: Feed Strategically (When Appropriate)
Feeding can support recovery, especially during comb building, dearth periods, or after stress.
- Use internal jar feeding through the Primal Bee feeding hole when feeding is needed
- Continue only as long as it contributes to comb drawing and population growth
Step 4: Identify the Likely Cause of Persistent Weakness
If a colony remains weak despite proper space and food support, common causes include:
- Queen performance issues (poor laying rate, failing queen)
- Queen replacement activity
- Pest pressure (especially varroa)
Management options:
- Requeen if queen performance is clearly poor
- In some cases, combine two weak colonies to form one stronger unit (when appropriate for your management plan).
Maximizing Strong Colony Potential
Strong colonies need two things: space and timing.
Provide Full Nest Space Early
- Move to full 8-frame configuration once the colony has sustained coverage and brood expansion
- Avoid constraining strong colonies with unnecessary follower boards
Stay Ahead of Congestion
- Add supers proactively during nectar flows
- If colonies appear to be running out of room, swarm risk increases
Queen Cells: What They Suggest
Queen cells are not all the same. Their location and context matters.
- Emergency / replacement cells often appear more in the middle area of comb and may indicate queen loss or poor queen performance.
- Swarm cells are more commonly built along the bottom edge of frames and indicate reproductive swarm preparation in a strong or crowded colony.
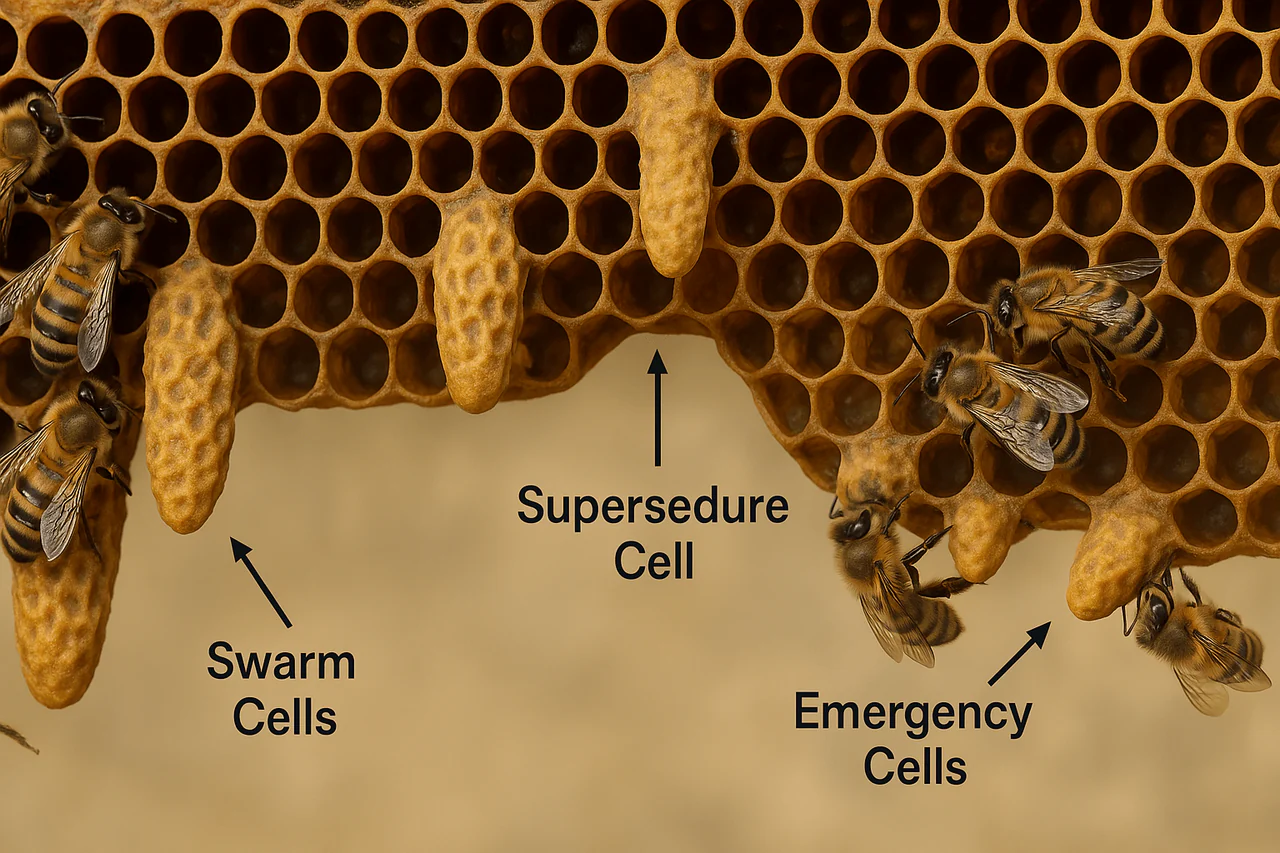
Practical notes:
- Occasionally you may see “practice” cups/cells that are empty or wax-only. Treat these as observations, not automatic action items.
Seasonal Considerations
Cold Weather Inspection Guidance
When temperatures are low, keep inspections short and targeted. Opening the hive interrupts work and forces the colony to re-stabilize temperature. In colder periods:
- Avoid full inspections unless necessary
- Check 1–2 frames for key indicators (brood, stores, general condition)
- Use entrance observations (activity, pollen) to reduce disturbance
Spring
- Strong colonies may require earlier space expansion and super readiness
- Weak colonies may require extended space reduction and feeding support
Summer
- Strong colonies may need multiple supers and careful congestion management
- Weak colonies should prioritize growth and health stabilization
Fall
- Ensure colonies enter winter with adequate population and accessible stores
- Consolidate space for smaller clusters so they can maintain brood and temperature efficiently
Troubleshooting Colony Issues
Persistent Weakness
- Verify queen is laying (brood/eggs or pollen intake)
- Check for queen cells and assess context (replacement vs swarm)
- Assess varroa risk indicators (including deformed wings or visible mites)
- Consider requeening or combining, depending on season and goals
Sudden Strength Loss
- Evaluate for signs of recent swarming
- Check for stress events (poisoning, robbing, overheating, environmental disruption)
- Reduce space temporarily if the population has dropped sharply
Performance Expectations
Primal Bee hives support stable brood rearing conditions, but results still depend on:
- Local forage availability
- Queen quality and colony genetics
- Pest and disease pressure
- Appropriate space management
Use the cavity as your control knob: reduce space to help weak colonies stabilize and grow; expand space early enough to keep strong colonies productive and less congested.
On this Page
- Colony Strength Assessment
- Non-Invasive Colony Growth Monitoring
- Configuration Management by Colony Strength
- Progressive Colony Management
- Supporting Weak Colonies
- Maximizing Strong Colony Potential
- Queen Cells: What They Suggest
- Seasonal Considerations
- Troubleshooting Colony Issues
- Performance Expectations


