Safety Straps & Anchoring


Wind damage poses a significant threat to any beehive. Primal Bee's integrated safety strap system provides protection while maintaining the hive's thermal seal integrity.
Understanding Wind Risks
Why Anchoring Matters
Wind can damage hive components, break the critical thermal seal, and disrupt the temperature stability that makes Primal Bee effective.
What proper anchoring prevents:
- Wind damage and temperature/humidity changes inside the hive
- Component displacement that breaks the thermal seal
- Moisture infiltration from below (when combined with proper hive stand setup)
- Hive damage during transport
Safety Strap Installation
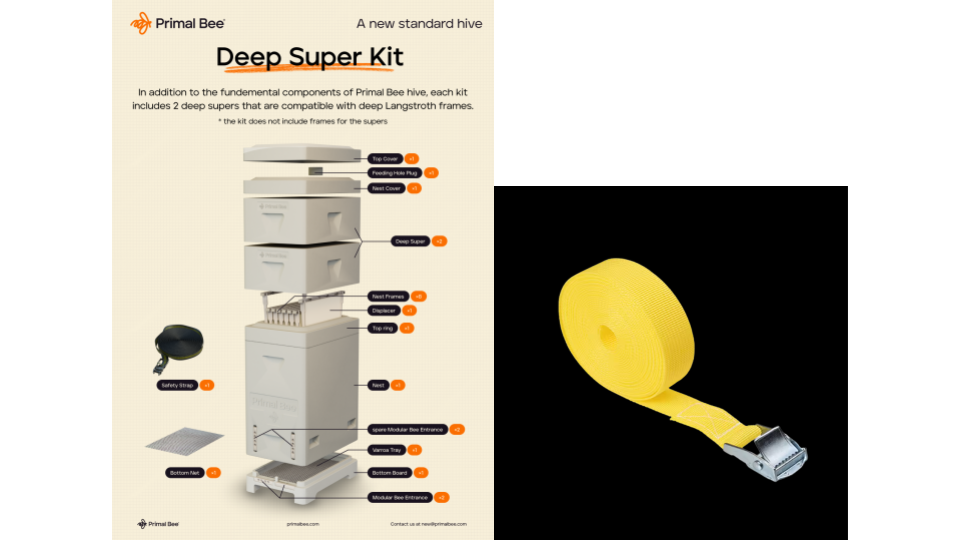
What's Included
Each Primal Bee hive comes with:
- 1x safety strap (adjustable)
- Compatible with all Primal Bee configurations
- Works with both winter and summer setups
Installation Process
Step 1: Hive Preparation
Before strapping, make sure all hive components are aligned and properly seated:
- Ensure all hive components are properly aligned
- Check that supers, nest, and covers are seated correctly
- Verify the thermal seal - make sure hive components are all seated properly to create a thermal seal
Step 2: Strap Positioning
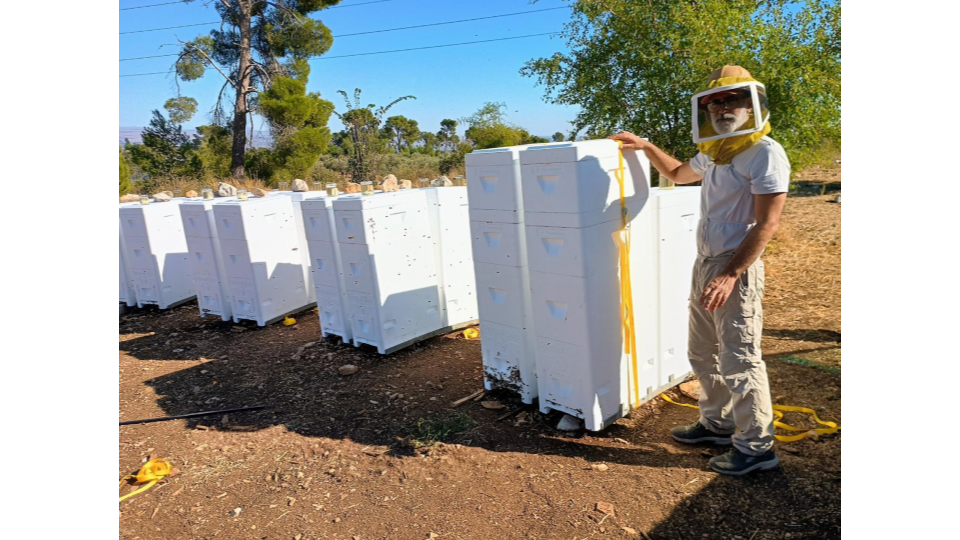
Thread the safety strap vertically around the complete hive assembly (otherwise it could be misinterpreted as putting it on horizontally like a belt):
- Position the strap mechanism away from the entrance
- Ensure the strap doesn't interfere with ventilation or bee access
Step 3: Tensioning
- Tighten gradually to avoid shifting hive components
- The strap should be snug but not compressive
- Test the assembly - components should remain aligned and stable
Anchoring Systems
Ground-Level Anchoring
For apiaries in moderate wind zones.
Materials needed:
- Concrete blocks or hive stands
- Tarp for moisture protection (place beneath the concrete blocks or hive stands to prevent moisture from coming up from the ground - hives are waterproof from above but have screen bottom boards which could be exposed to moisture from below)
- Support beams (4x4 lumber or similar that goes under the hive between the concrete blocks — not included)
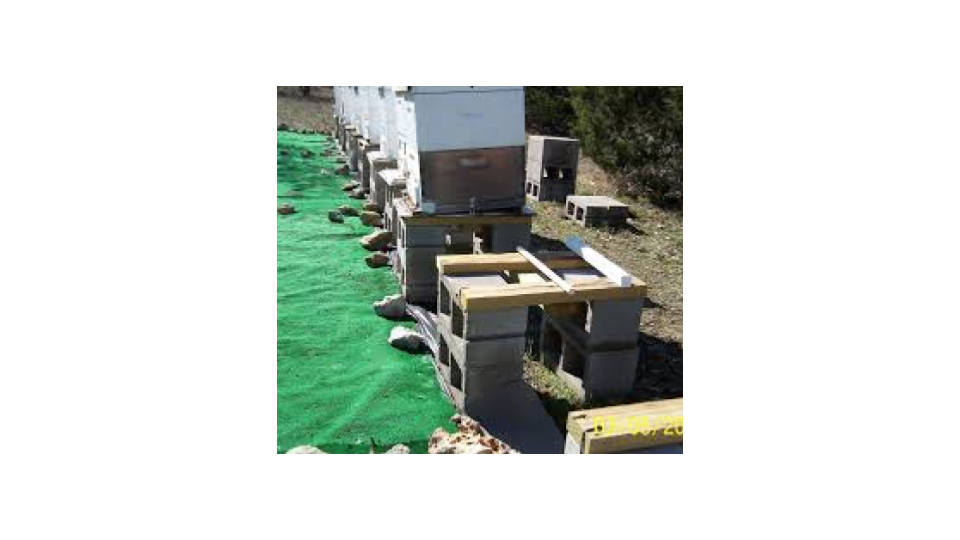
Setup process:
- Place tarp on ground (to prevent moisture from ground)
- Position concrete blocks or stable hive stands on the tarp
- Add support beams perpendicular to hive direction for stability (place 4x4 lumber or similar support beams on top of the concrete blocks)
- Position Primal Bee hive assembly on support beams
High-Wind Zone Anchoring
For exposed locations or areas with severe weather.
Enhanced anchoring materials:
- Ground anchors or concrete footings
- Secondary tie-down straps
- Windbreak (vegetation or fenceline)
Installation:
- Install ground anchors — 46 cm (18 inches) from hive corners
- Use the primary safety strap around the hive body
- Add secondary straps from ground anchors to the main safety strap
- Ensure stability and fit for all connections
Seasonal Strap Adjustments
Summer Configuration
Extendable straps can be adjusted for hive growth and additional supers:
- Accommodate multiple supers with extended strap length
- Adjust as needed during hive inspections
- Replace straps if signs of wear are observed
Winter Configuration
- Tighter configuration with fewer components
- Enhanced anchoring for winter storm protection
- Adjust as needed and replace straps if signs of wear are observed
Why This Matters
Using Primal Bee's safety straps to anchor your hive provides additional insurance against inclement weather while maintaining the thermal seal that keeps your colony stable and productive.
Additional benefit: Safety straps are also helpful for transporting hives safely and securely.